How to Ski: Everything Beginners Need for Day One (2026)
Skiing is easier to start than it looks. Here's how to plan your first day, set up your gear and learn the skills in the right order, from standing up to linking turns.
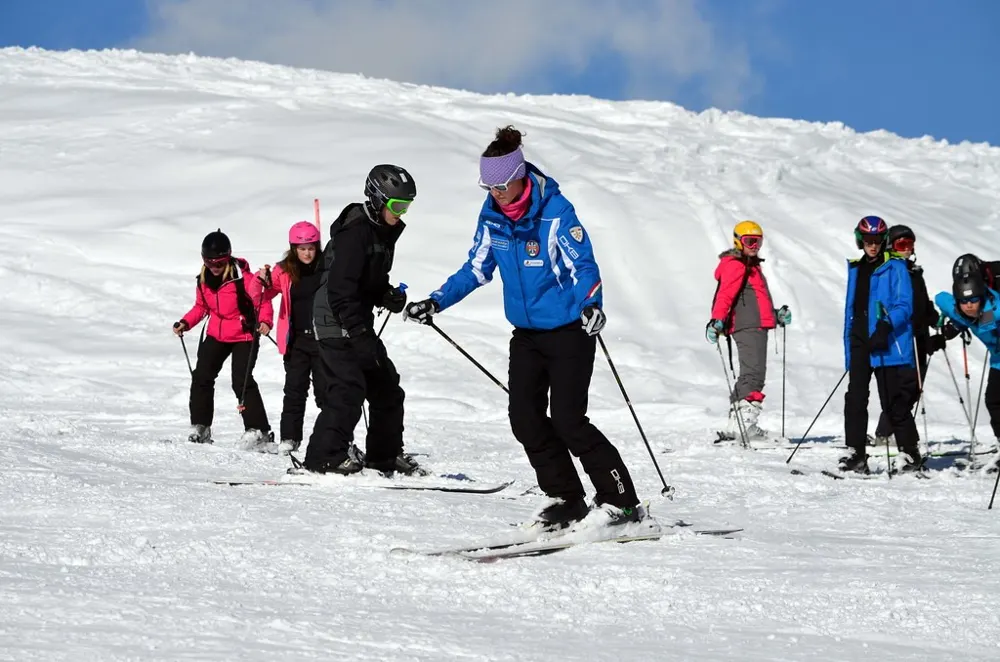
Skiing Is Easier to Start Than You Think
Learning to ski comes down to a handful of skills: standing in a balanced stance, sliding in control, slowing down with a wedge, turning, and using the lifts. Most beginners get the basics on gentle terrain in their first day or two. The fastest route is simple: rent good-fitting gear, take a lesson, and stay on beginner terrain until stopping and turning feel automatic.
This guide walks through planning your first day, the gear you need, and the skills to learn in order. When you're ready for more, see how to turn and stop on skis and the skiing hub.
Plan Your First Ski Day
Pick a Beginner-Friendly Place
Look for a resort or local hill with a dedicated beginner area: gentle slopes, a magic carpet (a conveyor-belt lift), and a ski school. Smaller hills are often cheaper and less crowded, which makes learning less stressful. Choose a day with soft snow and good visibility if you can; icy or flat-light days are harder.
Book a Lesson
A lesson is the single best investment on day one. Group lessons are the best value, and many resorts sell beginner packages that bundle a lesson, rental gear and a lift ticket for the learning area. Private lessons cost more but suit nervous skiers or anyone who wants faster progress. Book ahead in busy periods, and arrive at least an hour early to get through rentals.
Rent Your Gear
Rent skis, boots, poles and a helmet for your first trips. Renting at the resort is convenient, since staff can swap boots that hurt during the day; shops in town are sometimes cheaper and let you pick up gear the night before. Tell the shop your real height, weight, age and ability, because they use them to size your skis and set your bindings' release values.
Buy the Right Lift Ticket
Many resorts sell a cheaper ticket that only covers the beginner lifts, which is all you need on day one. Most tickets are now cards you scan or that open gates automatically, so keep yours in a pocket on its own, away from your phone.
What You'll Need
| Item | Rent or Bring? | Tip |
|---|---|---|
| Ski boots | Rent | Snug everywhere, toes just brushing the front when standing straight |
| Skis and bindings | Rent | Beginner skis are shorter and softer; see the ski size chart |
| Poles | Rent | Many instructors start beginners without poles |
| Helmet | Rent or bring | Certified for snow sports; see ski helmets |
| Goggles | Bring | Protect your eyes from wind, snow and UV |
| Jacket and pants | Bring | Waterproof and windproof; no jeans |
| Base and mid layers | Bring | Wool or synthetic, never cotton |
| Gloves or mittens | Bring | Waterproof; mittens are warmer |
| Ski socks | Bring | One thin, knee-high pair |
| Sunscreen and lip balm | Bring | UV is stronger at altitude and reflects off snow |
The full clothing guide is in what to wear skiing.
Smith Mission MIPS Helmet
A snow helmet with MIPS rotational protection. Rental helmets are fine, but many skiers buy their own early for fit and hygiene.
Check Price on AmazonSmith Squad Goggles
A popular goggle that often comes with a second lens for low light. Check the listing for the lenses included.
Check Price on AmazonGet Used to Your Gear
Ski Boots
Ski boots feel stiff and heavy at first. Put them on sitting down, pull the tongue forward, slide your foot in and tap your heel back. Buckle from the toe up, snugly but not painfully, and tighten the top strap. Wear one thin sock and tuck long underwear above the boot, not inside it. Walk heel-first, and take your time on stairs.
Carrying Your Skis
Clip the skis together at the brakes, then carry them on one shoulder with the tips pointing forward and down, holding them near the bindings. Watch the tails when you turn around in crowds. Carry poles in your other hand.
Clicking Into Your Bindings
- Lay the skis side by side on flat snow, across any slope so they can't slide away.
- Knock snow off the bottom of your boots.
- Put your boot toe into the front of the binding, then press your heel down firmly until it clicks.
- To get out, press down on the back lever of the binding with a pole tip or your other boot, and lift your heel.
Step 1: Find Your Athletic Stance
Everything in skiing starts from a balanced stance:
- Feet about hip- to shoulder-width apart, skis parallel.
- Ankles and knees gently flexed so your shins press lightly against the boot tongues.
- Weight centered over the middle of your feet, not on your heels.
- Hands forward and slightly out to the side, as if holding a tray.
- Eyes looking ahead, not at your skis.
A quick check: do a small hop. The position you land in is about where you want to be. Leaning back is the most common beginner mistake, and it makes the skis run away from you.
Step 2: Move on Flat Ground
- Shuffle and glide: slide one ski forward, then the other, using your poles lightly if you have them.
- Star turn: turn on the spot by stepping the tips (or tails) around in small steps, keeping the other end of the skis in place.
- Side-step: stand across the slope and step uphill one ski at a time, rolling your knees slightly into the hill so the uphill edges grip.
- Herringbone: to walk straight up a gentle slope, make a V with the tips apart and step up on your inside edges, like a duck.
Step 3: Your First Slide
Start on a very gentle slope with a flat runout so you stop on your own. Point your skis straight down, stand in your athletic stance and let yourself glide to a stop on the flat. Repeat until standing on moving skis feels normal.
Step 4: Learn the Wedge (Pizza)
The wedge, also called the snowplow or "pizza," is how beginners control speed and stop:
- Keep the ski tips a few inches apart and push the tails out so the skis form a V.
- Press gently on the inside edges of both skis.
- Make the wedge wider to slow down, narrower to speed up.
- Keep your knees apart, not squeezed together, and stay centered.
Practice gliding in a narrow wedge, then pushing it wider to stop, over and over. "French fries" means skis parallel, which goes faster.
Step 5: Wedge Turns
To turn, keep your wedge and steer with your legs and feet, not your shoulders. Put a little more weight on the ski on the outside of the turn: more on the right ski to turn left, more on the left ski to turn right. Look where you want to go. Link gentle turns back and forth down the slope, finishing each turn across the hill to control your speed.
To stop with a turn, keep turning until your skis point across or slightly up the hill. The slope does the braking for you.
Step 6: Falling and Getting Back Up
Everyone falls. If you feel yourself going, sit down to the side and uphill rather than forward or straight back, and keep your hands up. To get up:
- Roll so your skis are below you and across the slope, pointing sideways, not downhill.
- Bring your feet close to your hips.
- Plant your hands or poles on the uphill side and push yourself up over your feet.
- If it's too hard, click out of one ski, stand up, then step back in with the ski across the slope.
Step 7: Using the Lifts
Magic Carpets
Shuffle on with your skis straight, stand still and keep your poles in one hand. At the top, slide off and move out of the way.
Surface Lifts
Some hills use rope tows, T-bars or button lifts. Keep your skis in the track, stand rather than sit, and let the lift pull you. Your instructor will show you the local technique.
Chairlifts
- Take poles out of your wrist straps and hold them in one hand.
- Move to the loading line when the attendant signals, and look back over your shoulder for the chair.
- Sit back as the chair arrives, then lower the safety bar once everyone is ready.
- Keep skis straight and tips up as you approach the top; raise the bar when signs tell you.
- Stand up when your skis touch the ramp, push off gently and ski straight down and out of the way.
Tell the lift operator it's your first time; they can slow the lift. If you fall at the unload, move away quickly.
Step 8: Progress to Parallel
As your wedge turns get smoother and faster, your skis will naturally come closer together near the end of each turn. That's the start of parallel skiing. Work on it gradually, with drills, in how to turn and stop on skis. Using poles comes in here too: a light pole touch in the snow helps time each turn.
Understand Trail Ratings
| North America | Europe | Who It's For |
|---|---|---|
| Green circle | Green or blue | Beginners |
| Blue square | Red | Intermediates |
| Black diamond | Black | Advanced skiers |
| Double black diamond | Off-piste or itinerary routes | Experts |
Ratings are relative to each resort, so a green at a big mountain can be steeper than a green at a small hill. Stay on greens until you can stop and turn every time, and pick up a trail map so you don't take a wrong turn onto harder terrain.
Know the Code
The National Ski Areas Association's Responsibility Code, updated to 10 points in 2022, sets the basic rules on US slopes. The essentials for beginners:
- Stay in control so you can stop or avoid people and objects.
- People ahead of or below you have the right of way.
- Stop only where you can be seen from above, not below a rise or in a narrow spot.
- Look uphill before starting down or merging onto a trail.
- Prevent runaway equipment: ski brakes help, but don't leave skis where they can slide.
- Obey signs, stay off closed trails, and learn to use lifts safely.
- Don't ride lifts or ski when impaired, and share contact information after a collision.
Common Beginner Mistakes
| Mistake | What Happens | Fix |
|---|---|---|
| Leaning back | Skis speed up and you lose control | Press shins into the boot tongues |
| Looking at your skis | Wobbly, late turns | Look a few turns ahead |
| Squeezing knees together in a wedge | Skis cross and catch | Keep knees apart over your feet |
| Turning with your shoulders | Skids and falls | Steer with your feet and legs |
| Going too steep too soon | Fear and bad habits | Master greens first |
| Loose boots | Sore feet and weak control | Buckle snugly; ask for a smaller size |
| Braking with your poles | Wrist and shoulder injuries | Slow down with a wedge or turn |
How Long It Takes
There's no fixed timeline, but a common pattern looks like this:
- Day 1: stance, gliding, wedge stops and first wedge turns on the beginner area.
- Days 2–3: linked wedge turns on green runs and riding chairlifts.
- After several days: skis start matching in parallel and easy blue runs feel possible.
A few days of lessons in a row usually help skills stick better than a single day each season. Kids often pick it up quickly, and many ski schools take children from preschool age; check each school's minimum age.
Get Ready Before Your Trip
- Leg strength: squats, lunges and wall sits a few times a week for a month before you go help your legs last longer.
- Core and balance: planks and single-leg balance work help you stay centered.
- Hydrate and pace yourself: mountain air is dry and altitude tires you faster; take breaks.
- Protect your skin: UV increases with altitude and snow reflects much of it, so use sunscreen even on cloudy days.
Where to Learn
Resorts with lots of gentle terrain and strong ski schools make learning easier. See the best US ski resorts for family-friendly picks.
What to Buy First
If you get hooked, buy boots before skis: a well-fitted boot improves comfort and control more than anything else. See how to choose ski boots and the ski boot size chart. Then add your own helmet and goggles, and finally skis once you know the terrain you like. Thinking about the other side of the mountain? Compare skiing vs snowboarding.
Frequently Asked Questions
How long does it take to learn to ski?
Most beginners can stop and make basic turns on a gentle slope within their first day or two, especially with a lesson. Many people are comfortable on easy blue runs after a few days, but it varies a lot by person, fitness and conditions.
Can I teach myself to ski?
It's possible, but a lesson on your first day is safer and usually faster. Instructors fix stance problems early, before they become habits, and teach you to use lifts safely.
Should I take a group or private lesson?
Group lessons are good value and most resorts bundle them with rentals and a beginner lift ticket. Private lessons cost more but give you full attention, which helps nervous skiers and people short on time.
Do I need to buy ski gear to start?
No. Rent skis, boots, poles and a helmet for your first trips. If you keep skiing, buy boots first, because a well-fitted boot makes the biggest difference.
How do I stop on skis as a beginner?
Use a wedge (often called pizza): push your ski tails apart with the tips close together and press gently on the inside edges. A wider wedge slows you more. Turning uphill until you stop also works.
What do the colors on ski trails mean?
In North America, green circles are easiest, blue squares are intermediate, black diamonds are advanced and double black diamonds are for experts. Ratings are relative to each resort, and Europe uses green, blue, red and black.
Is skiing hard to learn?
The first hours are the hardest because the boots and skis feel strange. Most people find the basics, wedge stops and wedge turns, quicker to learn than they expected.
Why do my ski boots hurt?
Rental boots are often too big or not buckled snugly enough, which lets your feet move and rub. Ask the rental shop to check the size, wear one thin ski sock and tuck nothing into the boot.